Biking for Beginners Guide - tips and tricks to getting home in one piece
Biking is a fun activity that puts you in direct contact with nature, whilst you navigate your way around your local roads, trails or explore new areas. However, being away from busy cities and roads means that you need to know your way around your bike in case you have a mechanical issue in the middle of a ride.
THE BARE ESSENTIALS
Some riders like to ride light on the bike without much stuff hanging around and getting in the way. What to take:
Multitool - the Entity MT15 multi function tool can do almost everything on your bike and is as light as they come.
Tire levers - take 2 plastic ones
Tube repair kit/tubeless repair kit - if you don't want to carry an extra inner tube, at least carry emergency repair patches. Get some that require no glue. A good one to get would be the Entity RK15 puncture repair kit.
CO2 canister - ditch the bike pump and get a CO2 Kit to save extra weight and get your tire pumped in a matter of seconds.
Chain quick link - a chain link works as an extra link on your chain in case one breaks. The great thing about quick links is that they weight nothing and usually requires no tools to install.
THE WELL PREPARED RIDER
If you like to carry enough spares and tools to get you out of any problems by being mechanical savvy, you could use these:
Multi tool - A multi-tool with 20 or more functions covers almost every little bit and bolt on your bike, including chain breaker, spoke tool and bottle cap opener.
Tire levers - take 3 with you. Some tires are known for being stubborn and can break one of the tire levers. This way you'll have a spare one.
Extra tube and a tube repair kit - I usually only take one extra tube with me but on a really unlucky day where I might get 2 flat tires, it is reassuring to take some patches with you also to repair the tube.
Bike pump - a bit heavier and bulkier than a CO2 canister but you can use it unlimited times.
Valve adapter - this one might be useful if your bike has presta/french/bicycle valves instead of schrader/american/car valves. If you need/want to pump up your tires at a petrol station, you'll need this adapter to use their air.
Cable ties - different sizes and thickness - these are great for field repairs and for when you feel like pulling a Macgyver on your bike.

Spare rear derailleur hanger - essential if you crash and smack your rear derailleur on a rock. A quick 2 min job will have your gears working flawlessly back again. Read here how to change a rear derailleur hanger.
Painkillers - not exactly a tool per se but these can come in handy if you crash or start feeling pain somewhere. Weight nothing and take no considerable room.
Disc brake pads - it's hard to tell when you need to replace brake pads. I try to always carry a spare set with me for those muddy and rainy days where brake pads wear super quick.
HOW TO CARRY ALL OF THIS GEAR
I'm a huge fan of hydration packs and it makes perfect sense for me to keep tools and spares light and jam them all inside the backpack. Camelbak make some great options for hydration packs of all sizes.
If you choose a more conventional way of carrying all those parts, a saddle bag is a good starting point but you'll need to fix the pump or CO2 canister somewhere in the frame.
SAFETY
Prior to your ride, it's always best to run a quick check on your bike. You might find a problem that is fixable in your garage or at the trail's car park.
Brakes - squeeze them and do a couple braking tests to ensure all is fine
Gears - go up and down the cassette to verify gear tuning
Tires - check tire pressure by squeezing the tire with your hand
Steering - spin your bars left and right, we want frictionless movement here.
Steering (part 2) - with both wheels on the ground, hold your front brake lever and try to rock the bike front and backwards. We want everything feeling rock solid and no play anywhere the headset
Quick-releases and Thru Axles - double check that wheels are correctly installed and QR and/or Thru Axles fastened.
Drop test - lift your bike 3 inches off the ground and drop it. Things will rattle if not done properly. This will help you pin point where it's coming from.
KNOWING WHAT'S AROUND YOU
If you're not riding your local area, it's a good idea to do some homework the day before and study the surroundings prior to the ride. A quick google maps lookup will tell you of where nearby towns are and what services they have available. Also it is useful to see where local bike shops might be located if you need help from a professional mechanic or to buy a spare tube. Also, check on coverage for your cell phone if possible. It's always a good idea to tell your partner or a buddy where you'll be riding and why not try something like the Strava Beacon, which sends your emergency contact a link with your location at all times.
MECHANICAL TUTORIALS
It's great to have all the tools, but not particularly helpful if you don't know how to use them. Check the link below for some of the bike tutorials we have available.
- Training Tips for a Beginner Cyclist
- Industry Reviews
- Worth-it Blogs EP#3: Budget Hardtail Upgrades
- Drop bar Buyer's Guide
- Commuter Bike Guide
- The Bicycles Online's Company Fitness Challenge
- Mountain Bikes Buyer's Guide
- Bikes Online Does Sea Otter
- Worth-it Blogs EP#2: Hardtail Hitters
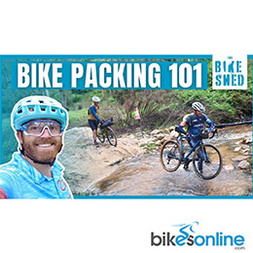
- Bikepacking 101
- Sustainable Strategies
- EWS #5: Burkville
- Pinned With Polygon | The gang goes to Crankworx
- Is It Worth Buying an Ebike? Weighing the Pros
- Is a Mountain Bike Good for Commuter Use? Exploring Versatility and Performance
- Ultimate Guide to Buying Cycling Gear Online
- Essential Bike Accessories for Every Cyclist
- Are Electric Bikes Safe? Unpacking the Truth for New Riders
- Mountain Bikes vs. Road Bikes: Which Is Safer for Your Cycling Adventures?
 USA
USA AUS
AUS
